CO2 Tank: Air Tools on the Trail
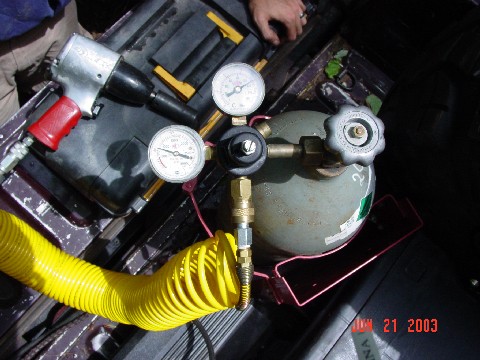
The tank itself can be bought or rented; it is a 20 lb. liquid CO2 tank (typically used for beverage purposes) with the standard CO2 thread and a simple open/close knob. This kind of tank is available for rent or sale at most any fire extinguisher, welding, or beverage supply shop; filling it up costs about $20 per fill.
The regulator is made by Tap-Rite, and looks like this: Tap-Rite 5700.
It has a high pressure (tank) gauge and a low pressure (output) valve; the low pressure side goes up to 160psi. If you get one of these, make sure you get one that goes that high - many of them only go up to 60 psi (which is more than enough for most beverage applications.) I got a used regulator on e-bay for about $20; there are usually a bunch of them available on there - just make sure it can handle the right output pressure to run your tools.
Once I had the regulator, I just threaded in one of the female quick-connectors so that I can connect my various air hoses and tools (all of which have male quick connects on them). On the trails, I find that a 50' coil air hose comes in most handy; if I need more length, I add a 25' straight hose.
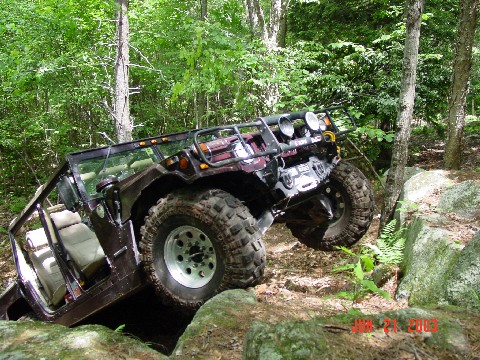
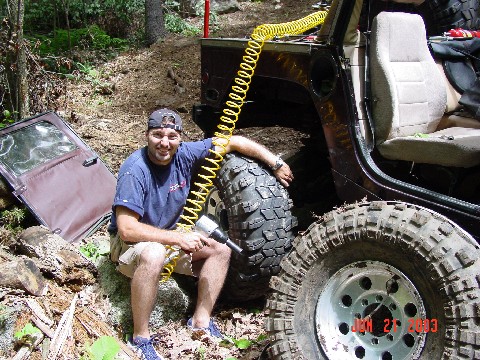
Some of you guys on the HML asked if I could post some pictures of my CO2 setup. Coincidentally, the very next weekend my friend Crispy and I had to made good use of my impact gun, after blowing off a bead while backing down to reapproach a steep climb. I think you guys may have wished it upon me to get a more interesting web page!
Here's what it looked like:
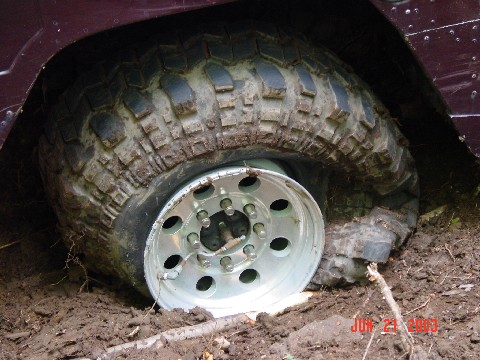
At first we tried reseating the bead on the truck by using a ratchet strap and turning the CO2 tank up to higher pressure (you can see the ratchet strap on the removed tire in the first picture below), but we were having trouble getting it to take... so we opted to turn dial the regulator down to 90psi and swap on the spare with the impact wrench instead, and then reseat the bead off the truck later. The whole job took all of about 6 minutes, including moving the truck to a better position and jacking up the rear bumper with a hi-lift. Changing the wheel itself only took about a minute. The most time consuming part of the whole job was getting to my tools which were packed underneath my soft-doors (I strap them down over the top of the truckbed when we are not using them)
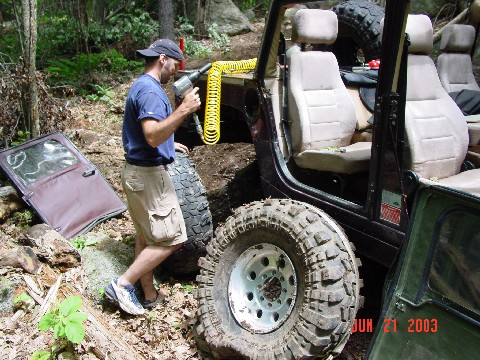
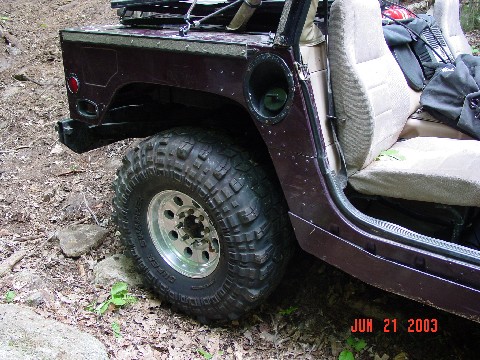
Here's what it looked like when we were done - good as new! Once we had the tire with the blown bead back up on the tire carrier, we were able to reseat it with the CO2 and the ratchet strap - the tire carrier makes a convenient stand for that kind of job!
And so - we were back on the trail to try again...(this time with a little more air in the tires) Alas, we still couldn't make it over this obstacle today - but we had fun trying!
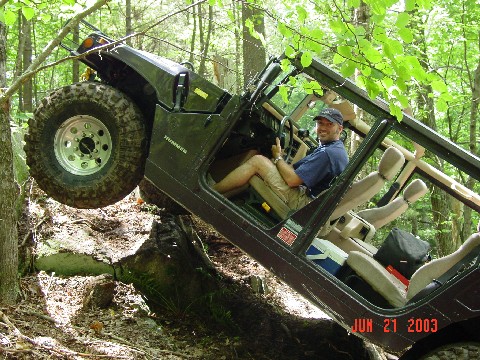
For some more pictures from the trail that day, click here: June 21 2003 Trail Ride